BIOS Update
Estimated time: 20-30 minutes
Warning - Turning off the power during a BIOS update can damage your motherboard.
Never disconnect the power during the update. If using a laptop, make sure the battery is sufficiently charged before proceeding.
What is a BIOS Update?
The BIOS is the first program that runs when you turn on your PC, and it controls the hardware.
Why is an update needed?
- Ensure compatibility with the latest hardware
- Stabilize TPM/Secure Boot related features
- Help the spoofer work properly
Pre-Update Checklist
- [ ] Stable power
- [ ] Confirmed your motherboard manufacturer
- [ ] Internet connection
Caution
If you don't know your motherboard manufacturer, check with the command below.
How to Check Your Motherboard
Press Win + R, type cmd and press Enter, then copy and paste the command below:
powershell -command "Get-CimInstance Win32_BaseBoard | Format-List Manufacturer, Product"
From the output: - Manufacturer: Motherboard manufacturer (Asus, GIGABYTE, MSI, ASRock, Biostar, etc.) - Product: Motherboard model name
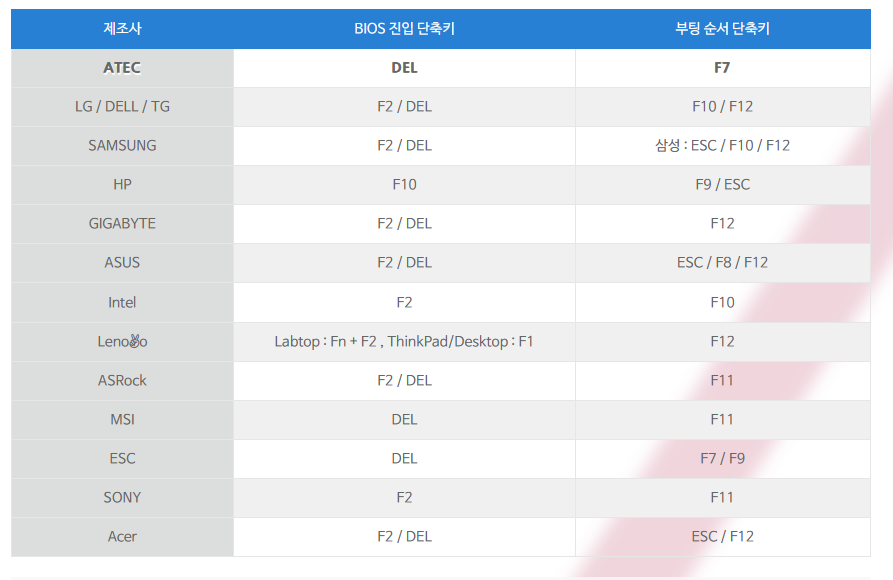
BIOS Entry Key / Boot Order Key by Manufacturer
Find your motherboard manufacturer in the table below and repeatedly press the matching key as soon as you power on the PC.
Want to see the real screen?
If the table alone isn't enough, each manufacturer tab in the Update Guide by Manufacturer section below includes a video showing the actual screen. Compare what appears after pressing the entry key with the video.
General Update Notes
Pre-Update Preparation
- Close all programs
- Make sure the power cable is securely connected
- If using a laptop, charge it to at least 50% battery
Precautions During Update
Things you should never do
- Unplugging the power cable
- Force shutdown (holding the power button)
- Moving the PC
- Operating the keyboard/mouse
How to Verify Update Completion
- The PC will reboot automatically
- If Windows runs normally after reboot, it succeeded
Manufacturer-Specific Update Guide
Select your motherboard below.
Asus BIOS Update Guide
1. Check current version
Win + R→ typecmdand press Enter- Enter the command below:
cmd
wmic bios get smbiosbiosversion
2. Download the latest version
- Visit the Asus download center
- Enter your motherboard model name in the top search bar
- Go to the Drivers & Tools tab → click BIOS
- Download the latest BIOS file
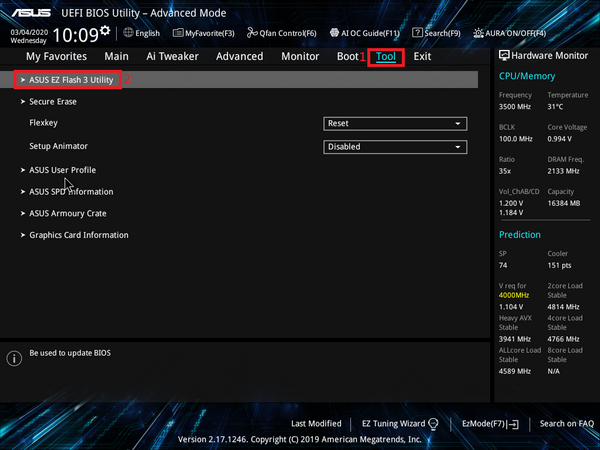
3. Use ASUS EZ Flash (Recommended)
- Enter BIOS (repeatedly press
F2orDel) - Go to EZ Flash or the Tools tab at the bottom → select ASUS EZ Flash Utility
- Select the BIOS file saved on USB
- Click the Flash button
- Wait until the progress reaches 100%
4. Automatic reboot and complete
GIGABYTE BIOS Update Guide
1. Check current version
Win + R→ typecmdand press Enter- Enter the command below:
cmd
wmic bios get smbiosbiosversion
2. Download the latest version
- Visit the GIGABYTE download center
- Search for your motherboard model name
- Go to the Support tab → click BIOS
- Download the latest BIOS file
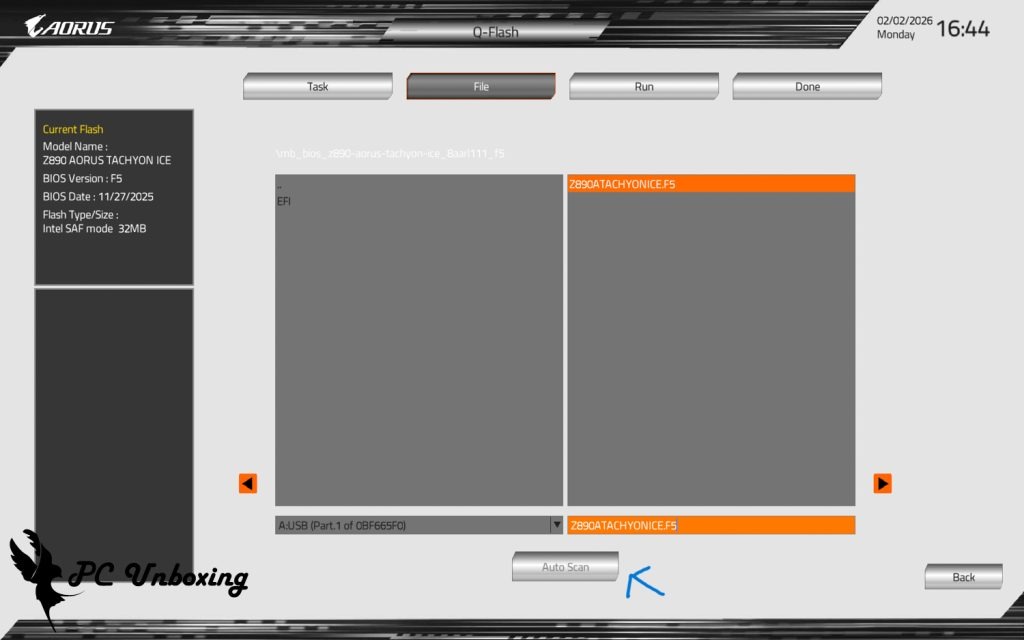
3. Use Q-Flash (Recommended)
- Enter BIOS (repeatedly press
Del) - Go to Q-Flash or the Save & Exit tab → select Q-Flash
- Select Update BIOS From Drive
- Select the file system (FAT32 recommended)
- Select the saved BIOS file
- Proceed with the update
4. Automatic reboot and complete
MSI BIOS Update Guide
1. Check current version
Win + R→ typecmdand press Enter- Enter the command below:
cmd
wmic bios get smbiosbiosversion
2. Download the latest version
- Visit the MSI download center
- Search for your motherboard model name
- Go to the Support tab → click BIOS
- Download the latest BIOS file
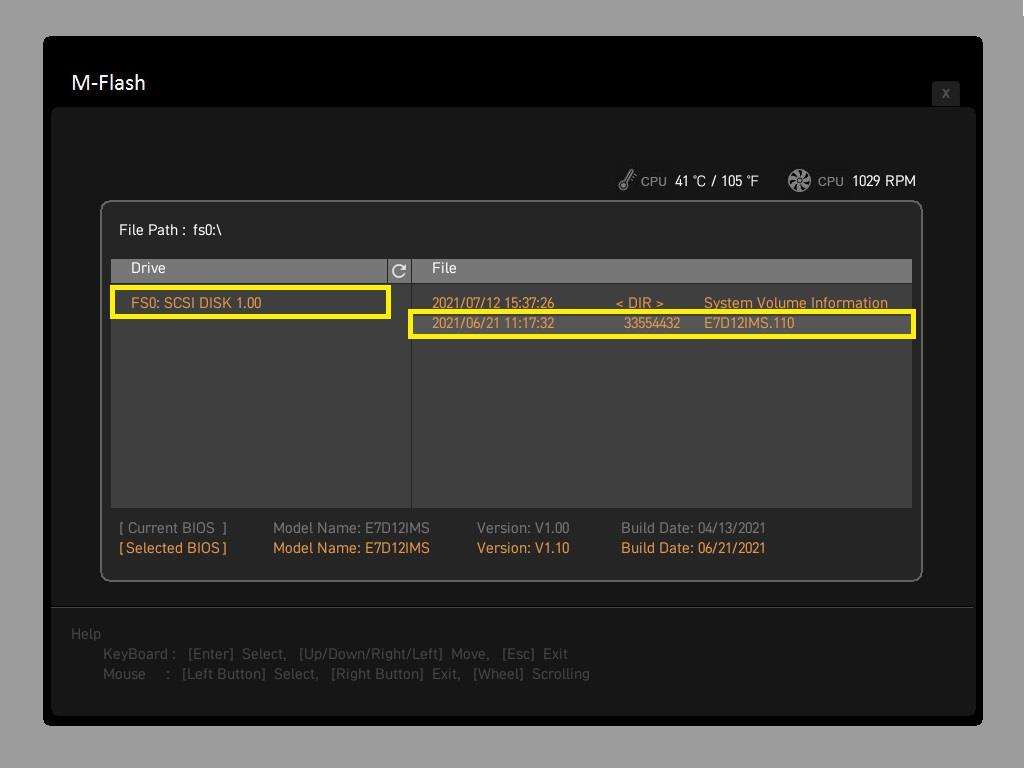
3. Use M-Flash (Recommended)
- Enter BIOS (repeatedly press
Del) - Click the M-Flash icon at the bottom
- Select Yes and BIOS will reboot
- Select the USB drive
- Select the BIOS file
- Proceed with the update
4. Automatic reboot and complete
ASRock BIOS Update Guide
1. Check current version
Win + R→ typecmdand press Enter- Enter the command below:
cmd
wmic bios get smbiosbiosversion
2. Download the latest version
- Visit the ASRock download center
- Enter your motherboard model name in the top search bar
- Go to the Support tab → click BIOS
- Download the latest BIOS file
3. Use Instant Flash (Recommended)
- Enter BIOS (repeatedly press
F2orDel) - Go to the Tools tab → select Instant Flash
- It will automatically search for BIOS files
- Select the latest version
- Proceed with the update
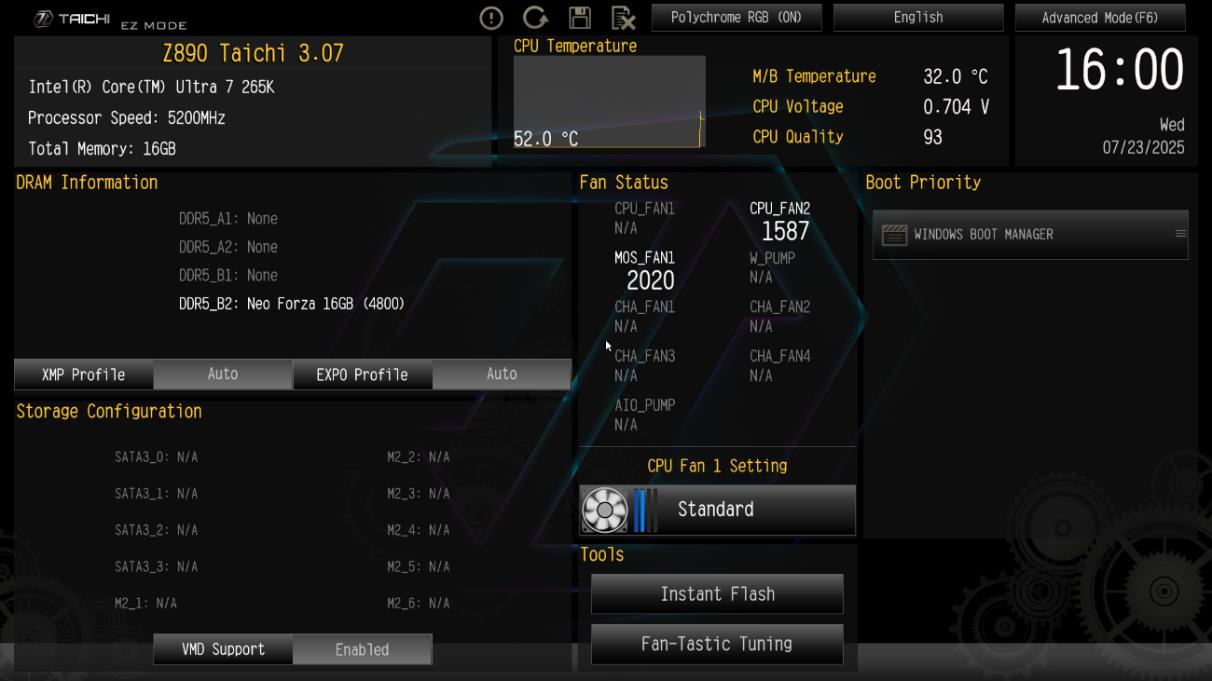
4. Automatic reboot and complete
Biostar BIOS Update Guide
1. Check current version
Win + R→ typecmdand press Enter- Enter the command below:
cmd
wmic bios get smbiosbiosversion
2. Download the latest version
- Visit the Biostar download center
- Search for your motherboard model name
- Go to the Support tab → click BIOS
- Download the latest BIOS file
3. Proceed with BIOS update
- Enter BIOS (repeatedly press
Del) - Go to the Save & Exit tab
- Select the BIOS update feature
- Select the BIOS file saved on USB
- Proceed with the update
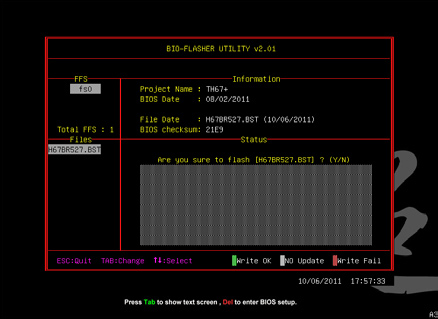
4. Automatic reboot and complete
Post-Update Checklist
- [ ] PC rebooted normally
- [ ] Windows runs normally
- [ ] BIOS version updated
How to check BIOS version
Win + R → cmd → enter the command below:
wmic bios get smbiosbiosversion
Troubleshooting
If the update fails
What to try if the update fails
- Unplug the power cable and reconnect (complete power cut)
- Perform a Clear CMOS (remove and reinsert the motherboard battery, or use a jumper)
- Try the update again after reboot
If reboot loops occur
If a reboot loop occurs
- Perform a Clear CMOS
- Restore default BIOS settings
- Contact support
Next step
BIOS update is complete. Now proceed to BIOS Settings.
Next step: BIOS Settings Guide →